
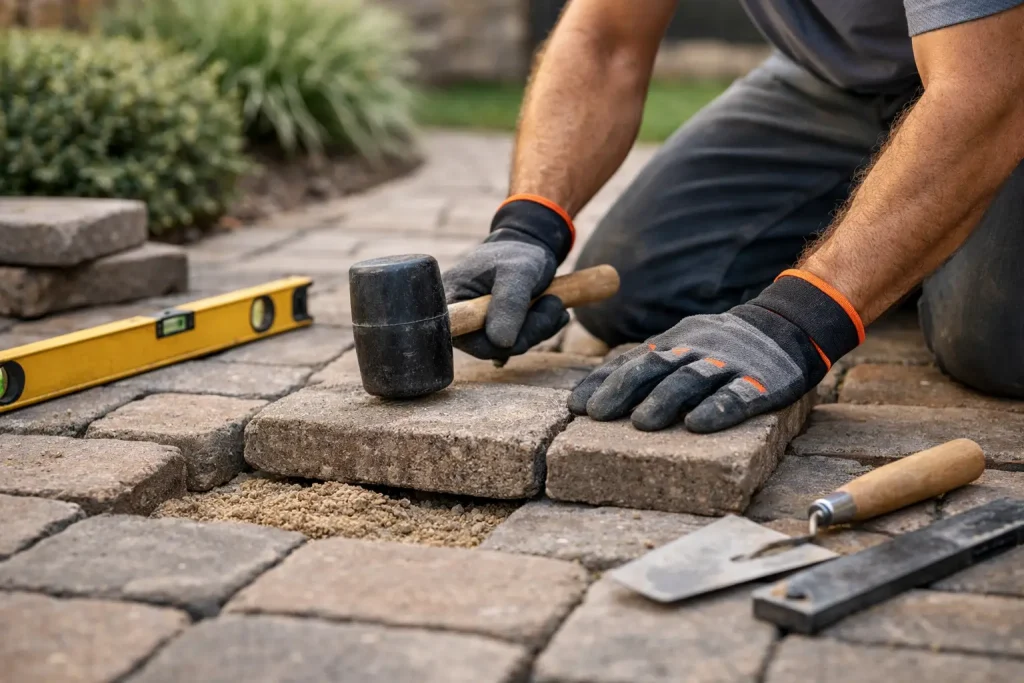
A patio can look clean from a distance and still create a real problem underfoot. When one or two pavers settle below the surrounding surface, water begins to pool, furniture starts to wobble, and a small trip hazard can spread across the walkway. This paver leveling repair guide explains what causes uneven pavers, how a proper repair works, and when it makes more sense to call a professional.
For homeowners, HOAs, and commercial property managers, leveling pavers is not just about appearance. A stable, properly sloped surface supports safer foot traffic, protects drainage, and helps you maintain the outdoor areas you already own. Maintain it, don’t replace it!
Why Pavers Sink or Shift
Pavers are designed to move slightly with normal ground conditions. They are individual units rather than one solid slab, which is one reason they can be repaired without demolishing an entire patio or walkway. Significant settling, however, usually points to a problem below the surface.
The most common cause is an inadequate or poorly compacted base. If the crushed-stone layer beneath the pavers was too shallow, was not compacted in stages, or has washed away over time, the pavers lose their support. The bedding sand then shifts into the empty space, leaving dips and low spots.
Water is often the reason that process accelerates. Downspouts that discharge onto a patio, irrigation overspray, leaking plumbing, poor landscape grading, and blocked drains can all send water beneath the pavers. In Southern California coastal conditions, repeated moisture, sandy soils, and runoff from hardscape areas can gradually undermine a base even without dramatic storms.
Tree roots are another possibility, especially along walkways and near mature landscaping. Roots typically push pavers upward rather than causing them to sink, but the result is the same: an uneven surface that needs attention before it becomes a larger safety issue.
Paver Leveling Repair Guide: Start With the Cause
Before lifting a single paver, identify where the water is going and why the affected area moved. Simply adding sand under a low paver may improve its appearance for a few weeks, but it will not hold if runoff is still eroding the base.
Look at the surface after irrigation or rain. Water should drain away from structures and should not stand along joints, door thresholds, or the edge of the patio. A broad shallow dip usually suggests base settlement. A concentrated hole near a downspout, drain, or irrigation line may indicate washout or a leak. Pavers raised in a line near planting beds often point to root pressure.
Also inspect the joints. Missing joint sand allows pavers to loosen and makes it easier for water and debris to work into the bedding layer. Ant activity, weeds, and recurring soft spots can be signs that the area below needs more than a cosmetic touch-up.
If you find a damaged drain, an active leak, or widespread settlement across a driveway or commercial walkway, address that underlying issue first. Leveling the pavers before correcting the drainage problem is money and effort that will likely be wasted.
How a Proper Paver Leveling Repair Works
A lasting repair involves rebuilding support from the bottom up. The exact depth and materials depend on the use of the surface. A footpath does not carry the same load as a vehicle driveway, and a heavily traveled retail walkway has different performance needs than a small backyard patio.
Remove and save the affected pavers
Start by removing pavers from the low or raised section, plus enough surrounding pavers to reach stable ground. A flat pry bar or dedicated paver puller can help lift the first unit without chipping edges. Set each paver aside in the same general pattern so it can be reinstalled correctly.
Take care with older pavers. Their color may have softened with age, and replacing only a few units with new material can create an obvious patch. Reusing intact pavers preserves a more consistent appearance.
Excavate unstable bedding material
Once the pavers are out, remove loose bedding sand and inspect the aggregate base. If the base is firm, dry, and properly compacted, the repair may only require regrading the bedding layer. If it is soft, muddy, hollowed out, or mixed with soil, excavate until you reach stable material.
Do not use ordinary soil to fill a low spot. Soil holds moisture and compresses unevenly. A compactable crushed aggregate base is the right support material, followed by a thin, even bedding layer of concrete sand or the material specified for that paver system.
Rebuild the base in compacted lifts
Add aggregate in shallow layers, compacting each layer before adding the next. This step takes time, but it is where long-term stability is created. A plate compactor is usually needed for anything beyond a very small repair, particularly on driveways, common areas, or surfaces with recurring settlement.
Check the slope as you rebuild. Patios and walkways should direct water away from the building and toward a suitable drainage area. The needed pitch is modest, but it must be consistent. A surface that is perfectly level may look neat while holding water against a wall, doorway, or foundation.
Screed the bedding layer and reset the pavers
The bedding layer should be thin and uniform, not a deep cushion used to make up for a bad base. Screed it smooth with a straight board, then set the pavers back into their original pattern. Check the surface frequently with a straightedge and level so the repaired area sits flush with the surrounding field.
Avoid repeatedly lifting and dropping pavers into place. Set them carefully, then make minor adjustments by adding or removing small amounts of bedding material. Once the pattern is back in place, compact the pavers with a protective pad on the compactor to reduce the chance of scuffing or cracking the surface.
Refill the joints and finish the edges
Sweep joint sand into every gap and compact again so the sand settles fully. Repeat the process until the joints remain filled. Depending on the paver system and local conditions, polymeric joint sand may help resist washout and weed growth, but it must be installed exactly as directed. Too much water during activation can leave a haze, while too little can prevent proper binding.
Finally, inspect the edge restraints. Loose, broken, or missing restraints allow pavers to spread outward over time. A repaired center section will not stay level if the perimeter is failing.
When a DIY Repair Makes Sense
A small, isolated dip on a patio is often manageable for a capable homeowner with the right tools, dry weather, and a clear understanding of drainage. The job is more approachable when the pavers are intact, the base problem is limited, and the surface does not support vehicles.
The trade-off is that lifting pavers can reveal more damage than expected. What begins as a two-paver adjustment can turn into a larger base rebuild when the bedding sand is washed out or the edge restraint has failed. If the affected area is near a foundation, pool deck, retaining wall, drain, or utility line, a professional assessment is the safer choice.
Commercial walkways, HOA common areas, and driveways also deserve a higher standard of repair. These surfaces carry more traffic and more liability. The repair needs to account for drainage, accessibility, edge support, and a finish that does not create a new trip point at the perimeter.
Clean Pavers Carefully After Leveling
Once the surface is stable, cleaning can restore the color and curb appeal that uneven, stained pavers tend to hide. Timing matters. Fresh joint sand, especially polymeric sand, needs adequate cure time before cleaning. Pressure washing too soon can pull sand from the joints and undo part of the repair.
High pressure aimed directly into paver joints is a common mistake. It can strip joint material, disturb the bedding layer, and force dirty runoff into nearby landscaping or drains. Surface-specific cleaning uses the appropriate pressure, detergent, and technique for the condition of the pavers, whether the issue is algae, tire marks, food spills, pet staining, or accumulated coastal grime.
Runoff deserves the same attention as the pavers themselves. On commercial sites and dense residential properties, wash water can carry sediment, cleaning products, oil residue, and contaminants toward storm drains. Channel Islands Pressure Washing uses closed-loop water recovery where appropriate to capture runoff and help keep contaminated water out of local waterways.
Keep the Repair From Returning
A few maintenance habits can extend the life of a leveled patio or walkway. Keep drains and gutters clear so water is not dumped onto the hardscape. Adjust irrigation heads that spray pavers every day. Replace lost joint sand before the joints become open channels for water and debris, and watch for early movement after heavy rain or landscape work.
If a paver starts to rock, sinks enough to hold water, or creates a noticeable edge underfoot, address it while the repair remains small. A level surface is easier to clean, safer to use, and far less costly to maintain than a patio or walkway that has been allowed to fail from the base up.
Pingback: Why Pavers Sink and How to Stop the Damage – Channel Islands Pressure Washing, LLC